

Veze Automatic Doors Fingerprint Access Control
-
Price:
Negotiable
- minimum:
- Total supply:
-
Delivery term:
The date of payment from buyers deliver within days
-
seat:
Zhejiang
-
Validity to:
Long-term effective
-
Last update:
2017-12-25 08:15
-
Browse the number:
164
+
Ningbo VEZE Automatic Door Co., Ltd.
- Contactaixin:
Ms. Amy Li(Mr.)
-
Email:
telephone:
phone:

-
Arrea:
Zhejiang
Address:#128 Qiming Road, Yinzhou Area, Ningbo, Zhejiang, China 315015
- Website:
+
*Overview
▪Strictly follow the national security product standard. Suitable for the entrance and exits of office, factory, hotel, school, etc.
▪Adopting RS485 or TCP/IP carries out networking. USB flash drive upload/download is available.
•Anti-dismantlement alarm, threatens alarm, unlock illegally alarm, not block alarm are available.
•Fingerprint / Card / Password / Fingerprint + Card / Fingerprint + Password / Card + Password / Fingerprint + Card + Password identification modes are available.
▪RIMS software for managing the user information and attendance records.
*Installation Precautions
▪Before installing, please make sure that the power supply is cut off. The contact of power cord may damage the device if the installation and wire connection are performed when the power supply is connected.
▪As human body carries too much static electricity in autumn and winter, please connect the earth wire before connecting other wires to avoid damaging the device because of too high instant static voltage.
▪The bare parts of all wiring terminals should be no longer than 5mm. It may cause short circuit and damage the device if the bare wire is too long; in addition, to make it easy to recognize, please connect the terminals with cables of different colors.
▪Please connect other cables before connecting the power cord, and then connect the power supply and test the device. If the device can't work normally when the power supply is connected, please cut off the power supply and then check the device.
▪If the power supply is too far away from the device, do not use the network cable to replace the power cord. The voltage attenuation caused by long transmission distance should be considered when selecting power cord.
▪The warranty doesn't cover the damage of circuit, mainboard and fingerprint collector, and malfunction caused by improper wiring.
▪The device should be installed at the height of 1.4-1.5m.
▪To test the access control function after installing, there should be people both inside and outside the door to avoid failing to access normally in case of accident.
*Basic Operation
Turning on
After connecting the power cord, press the⊙key, the LCD displays the main interface and a long beep accompanies.
Note:The power supply for the Fingerprint Access Control / Attendance Time Clock must be DC 12V.
Access Menu
Press the (MENU) key to access the Menu to manage the data and set the menu.
Personnel management
In the menu, select(Enroll) and press the (OK) Button to access the menu; then, select USER or (Manager) to register the fingerprints, sensor card, and password.
The administrators include (Sup Manager) and (Geb Manager). They have different management authorties.
Function settings
In the menu,select (setup) and press the (OK) button to enter the setting menu. The (setup) menu consist of (System), (Lock Setting), (Communication) and (LOG SETUP).
Checking access records
On the menu, select (Glog View) and press the (OK) button to enter the menu. You can check the attendance timeand number of times.
System information
In the menu, select (System info) and press the (OK) button to enter the submenu. You can chech the registration information of system.
*Personnel Management
In normal working state, press the (MENU) button to access the Menu directly if no administrator is registered. Press the scroll down button to view the menus. If (Enroll) is selected, press the (OK) button to access level-2 menu.(Enroll) consisits of five level-2 menus, which are user, (Manager), (Delete), (Download) and (Allong Delete).
User register
Seven modes are available for the validation of the device: Fingerprint, Password, Crad No., Card+Fingerprint, Card+Password, Fingerprint+Password, Card+Fingerprint+Password.
▪[Card-Finger-Password]: you need to register fingerprint, or sensor card, or password to pass the validation.
▪[Finger + Password]: you need to register fingerprint and password and pass both the fingerprint validationand the password validation.
▪[Card + Finger]: you need to register sensor card and fingerprint and pass both the sensor card validation and the fingerprint validation.
▪[Card + Password]: you need to register sensor card and password and pass both the sensor card validation and the password validation.
▪[Card + Finger + Password]: you need to register sensor card, fingerprint and password and pass the sensor card validation, the fingerprint validation and the password validation at the same time.
When the user register, each person has only one exclusive (Enroll ID), and the number must be corresponding to the Enroll ID in the attendance management software, each (Enroll ID) can register up to three fingerprints, one sensor card number and one password.
Fingerprint register
The normal working interface of the device is shown below:
Step of registering fingerprint:
In the normal working state, press the (MENU), button to access (MENU)-----(Enroll)-----User-----(Fingerprint)-----(New Enroll)-----Input Enroll ID-----Press same finger for three times-----Save-----Exit.
Password rigister
Press the (Menu) button to access the Menu-----(Enroll)-----User
Select the (Password) and preess the (OK) button.
Press the (OK) button again to confirm and set password for the new Enroll ID.
Input the Enroll ID of certain personnel and press the (OK) button.
Note: The password contains up to four digits. Input the password and press the (OK) button to display (NEW ENROLL), PWD in and confirm.
*Enroll
Press the (Menu) button to access (Menu)-----(Enroll)-----(Delete) and press the (OK) button to display the (Delete id00001).
Input the Enroll ID to be deleted (e.g.00001), and press the (OK) button to display the (Delete ID 00001-0).
Note: The last finger of 0000-1-0indicates the number of the fingerprint (0 indicates the first fingerprint).
Press the (OK) button to confirm and the (Delete--Yes--No), press the (OK) button to delete and the (DELETE?) interface pops up after a beep; you can press the (ESC) button to cancel deleting.
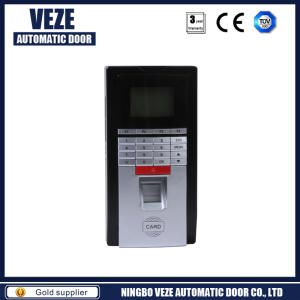
The Picture of Automatic Doors Fingerprint Access Control


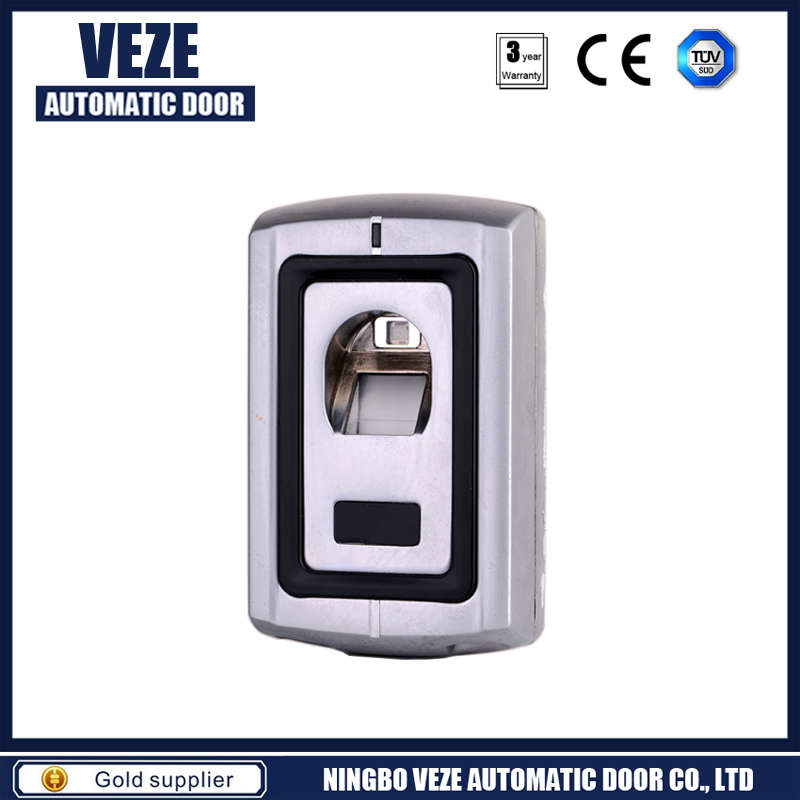
Other Type of Fingerprint Access Control
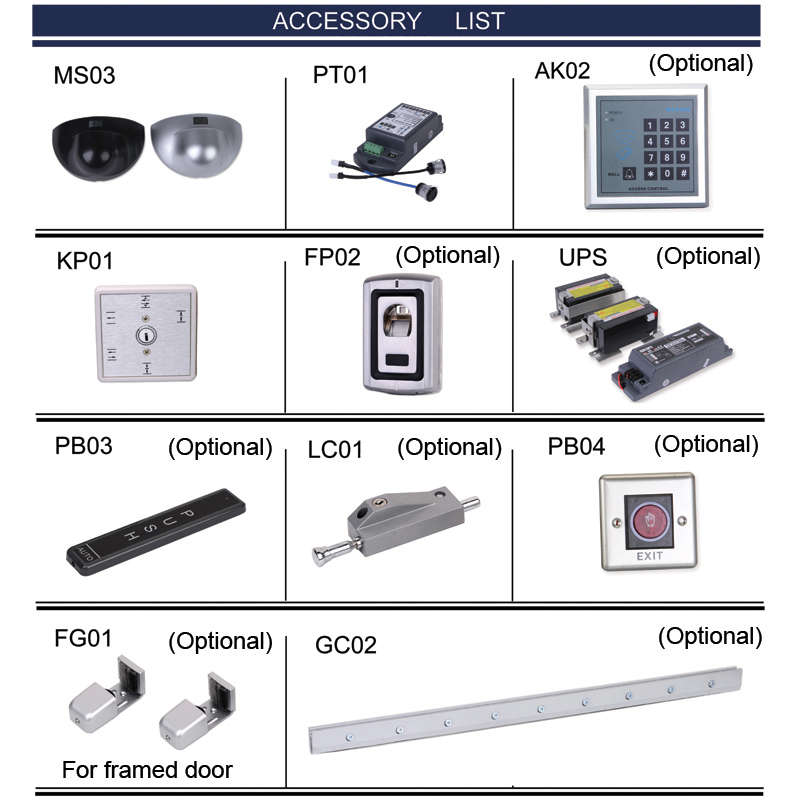
Accessories List & Optional Parts

Technical Parameters
Fingerprint Sensor Resolution: 500DPI
Rotational Angle: Total Rotational Angle
FRR≤0.1%
FAR≤0.0001‰
Identification Time≤0.1s
Query Record: Available
Operating Mode: Available
Authentication Mode: 1:1, 1;N
Indentification Mode: Fingerprint/ID Card/Password
Fingerprint Capacity: 1,000
Communication: TCP/IP, Rs485
USB Fash Drive Upload/Download: Available
Language: Chinese, English, Persian, Thai, Portuguese, Vietnamese
Vioce Prompt: Available
Capacity Notification: Alarm when log capacity is full
Bell: Built-in timing bell
Lock Output: normal Open/ Normal Closed
Door Open Button: Can connect communication, or the wire less remote controlled button
Door bell Output: Can connect doorbell
Access control interface: Wiegand, Input/Output
*Troubleshooting
1.Q:Why the terminal can't find available device when RS485 communication is activated?
A:Operate in the following method:
1)Check whether the device No., baud rate, device type and communication mode set in the management software accord with the settings of the terminal;
2)Reduce the baud rate to 9600bps or change another PC;
3)Check whether the cable is connected properly; see the hardware manual for the wiring method; if the problem
still exists, please refer to the Warranty Card and contact local service center.
2.Q:Why the terminal can't find available device when TCP/IP communication is activated?
A: Follow the steps below:
1)Access the [Device Management] - [Connect to Device] - [Connecting Options] menu in the management software and check whether the selected device type in the software is correct;
2)The communication mode must be TCP/IP and the searching range is the device number of the terminal; refer to the values set in the terminal for the IP address and port number;
3)The [Password] of the terminal is 0 by default; you can change it into your own private password;
4)Because the terminal communicates in specified port number, please make sure that the port isn't disabled by the firewall or any other network device (port 80 is available);
5)The terminal supports multiple network segments, but you need to pay attention to the setting of subnet mask.
3.What to do if there is no reaction or the reaction is slow when personnel press fingers to check attendance?
1)Maybe the finger is too dry or too wet; the fingerprint sensor works in optical principle, and it will make the recognization too slow or even can't recognize. Please touch the wet towel with the finger, or wet the finger and wipe to 50% dry to improve the sensitivity and recognition rate;
2)The fingerprint of the employee is rubbed seriously; choose a finger with clear fingerprint and register;
3)The employee don't press in the proper way; keep the fingerprint surface parallel to the sensor to keep enough contact area and improve the sensing speed.
4.Why terminal senses automatically and asks to repress the finger even when no person checks attendence? A:Reasons and solutions:
1)The terminal is irradiated by sunshine directly or the position where the terminal is placed has strong light; please move the terminal to another position;
2)The fingerprint sensor is stained with dirt; please wipe with wet soft cloth;
3)Access the menu of the terminal to set the [Bri Adjust]. Please contact local service center if the problem still exit.
5.Why the LCD of the terminal isn't clear or only has backlight and no characters?
A:The terminal has the menu [LCD Contrast] and the value should be 22 to 30. If the value is 0, the screen only has backlight but no characters. You can also adjust this option in the management software if the terminal is connected to the PC.
6.Q:I use the attendance software for the first time. What should I do?
A:Refer to the manual of the attendance management software.
7.Q:What's the operating procedure when new employee is enrolled?
A:When the terminal is turned on, press the [MENU] button to access the menu, select [Enroll]→[OK]→User→ select registration type, for example, select [Finger]→[OK]→[New Enroll?]→select "Yes" and press the [OK] button→input the registration number→[OK]→follow the prompt and put the finger close to the fingerprint sensor of the terminal to read the fingerprint information→save the new registration and press the [OK] button.
▪Strictly follow the national security product standard. Suitable for the entrance and exits of office, factory, hotel, school, etc.
▪Adopting RS485 or TCP/IP carries out networking. USB flash drive upload/download is available.
•Anti-dismantlement alarm, threatens alarm, unlock illegally alarm, not block alarm are available.
•Fingerprint / Card / Password / Fingerprint + Card / Fingerprint + Password / Card + Password / Fingerprint + Card + Password identification modes are available.
▪RIMS software for managing the user information and attendance records.
*Installation Precautions
▪Before installing, please make sure that the power supply is cut off. The contact of power cord may damage the device if the installation and wire connection are performed when the power supply is connected.
▪As human body carries too much static electricity in autumn and winter, please connect the earth wire before connecting other wires to avoid damaging the device because of too high instant static voltage.
▪The bare parts of all wiring terminals should be no longer than 5mm. It may cause short circuit and damage the device if the bare wire is too long; in addition, to make it easy to recognize, please connect the terminals with cables of different colors.
▪Please connect other cables before connecting the power cord, and then connect the power supply and test the device. If the device can't work normally when the power supply is connected, please cut off the power supply and then check the device.
▪If the power supply is too far away from the device, do not use the network cable to replace the power cord. The voltage attenuation caused by long transmission distance should be considered when selecting power cord.
▪The warranty doesn't cover the damage of circuit, mainboard and fingerprint collector, and malfunction caused by improper wiring.
▪The device should be installed at the height of 1.4-1.5m.
▪To test the access control function after installing, there should be people both inside and outside the door to avoid failing to access normally in case of accident.
*Basic Operation
Turning on
After connecting the power cord, press the⊙key, the LCD displays the main interface and a long beep accompanies.
Note:The power supply for the Fingerprint Access Control / Attendance Time Clock must be DC 12V.
Access Menu
Press the (MENU) key to access the Menu to manage the data and set the menu.
Personnel management
In the menu, select(Enroll) and press the (OK) Button to access the menu; then, select USER or (Manager) to register the fingerprints, sensor card, and password.
The administrators include (Sup Manager) and (Geb Manager). They have different management authorties.
Function settings
In the menu,select (setup) and press the (OK) button to enter the setting menu. The (setup) menu consist of (System), (Lock Setting), (Communication) and (LOG SETUP).
Checking access records
On the menu, select (Glog View) and press the (OK) button to enter the menu. You can check the attendance timeand number of times.
System information
In the menu, select (System info) and press the (OK) button to enter the submenu. You can chech the registration information of system.
*Personnel Management
In normal working state, press the (MENU) button to access the Menu directly if no administrator is registered. Press the scroll down button to view the menus. If (Enroll) is selected, press the (OK) button to access level-2 menu.(Enroll) consisits of five level-2 menus, which are user, (Manager), (Delete), (Download) and (Allong Delete).
User register
Seven modes are available for the validation of the device: Fingerprint, Password, Crad No., Card+Fingerprint, Card+Password, Fingerprint+Password, Card+Fingerprint+Password.
▪[Card-Finger-Password]: you need to register fingerprint, or sensor card, or password to pass the validation.
▪[Finger + Password]: you need to register fingerprint and password and pass both the fingerprint validationand the password validation.
▪[Card + Finger]: you need to register sensor card and fingerprint and pass both the sensor card validation and the fingerprint validation.
▪[Card + Password]: you need to register sensor card and password and pass both the sensor card validation and the password validation.
▪[Card + Finger + Password]: you need to register sensor card, fingerprint and password and pass the sensor card validation, the fingerprint validation and the password validation at the same time.
When the user register, each person has only one exclusive (Enroll ID), and the number must be corresponding to the Enroll ID in the attendance management software, each (Enroll ID) can register up to three fingerprints, one sensor card number and one password.
Fingerprint register
The normal working interface of the device is shown below:
Step of registering fingerprint:
In the normal working state, press the (MENU), button to access (MENU)-----(Enroll)-----User-----(Fingerprint)-----(New Enroll)-----Input Enroll ID-----Press same finger for three times-----Save-----Exit.
Password rigister
Press the (Menu) button to access the Menu-----(Enroll)-----User
Select the (Password) and preess the (OK) button.
Press the (OK) button again to confirm and set password for the new Enroll ID.
Input the Enroll ID of certain personnel and press the (OK) button.
Note: The password contains up to four digits. Input the password and press the (OK) button to display (NEW ENROLL), PWD in and confirm.
*Enroll
Press the (Menu) button to access (Menu)-----(Enroll)-----(Delete) and press the (OK) button to display the (Delete id00001).
Input the Enroll ID to be deleted (e.g.00001), and press the (OK) button to display the (Delete ID 00001-0).
Note: The last finger of 0000-1-0indicates the number of the fingerprint (0 indicates the first fingerprint).
Press the (OK) button to confirm and the (Delete--Yes--No), press the (OK) button to delete and the (DELETE?) interface pops up after a beep; you can press the (ESC) button to cancel deleting.
The Picture of Automatic Doors Fingerprint Access Control
Other Type of Fingerprint Access Control
Accessories List & Optional Parts
Technical Parameters
Fingerprint Sensor Resolution: 500DPI
Rotational Angle: Total Rotational Angle
FRR≤0.1%
FAR≤0.0001‰
Identification Time≤0.1s
Query Record: Available
Operating Mode: Available
Authentication Mode: 1:1, 1;N
Indentification Mode: Fingerprint/ID Card/Password
Fingerprint Capacity: 1,000
Communication: TCP/IP, Rs485
USB Fash Drive Upload/Download: Available
Language: Chinese, English, Persian, Thai, Portuguese, Vietnamese
Vioce Prompt: Available
Capacity Notification: Alarm when log capacity is full
Bell: Built-in timing bell
Lock Output: normal Open/ Normal Closed
Door Open Button: Can connect communication, or the wire less remote controlled button
Door bell Output: Can connect doorbell
Access control interface: Wiegand, Input/Output
*Troubleshooting
1.Q:Why the terminal can't find available device when RS485 communication is activated?
A:Operate in the following method:
1)Check whether the device No., baud rate, device type and communication mode set in the management software accord with the settings of the terminal;
2)Reduce the baud rate to 9600bps or change another PC;
3)Check whether the cable is connected properly; see the hardware manual for the wiring method; if the problem
still exists, please refer to the Warranty Card and contact local service center.
2.Q:Why the terminal can't find available device when TCP/IP communication is activated?
A: Follow the steps below:
1)Access the [Device Management] - [Connect to Device] - [Connecting Options] menu in the management software and check whether the selected device type in the software is correct;
2)The communication mode must be TCP/IP and the searching range is the device number of the terminal; refer to the values set in the terminal for the IP address and port number;
3)The [Password] of the terminal is 0 by default; you can change it into your own private password;
4)Because the terminal communicates in specified port number, please make sure that the port isn't disabled by the firewall or any other network device (port 80 is available);
5)The terminal supports multiple network segments, but you need to pay attention to the setting of subnet mask.
3.What to do if there is no reaction or the reaction is slow when personnel press fingers to check attendance?
1)Maybe the finger is too dry or too wet; the fingerprint sensor works in optical principle, and it will make the recognization too slow or even can't recognize. Please touch the wet towel with the finger, or wet the finger and wipe to 50% dry to improve the sensitivity and recognition rate;
2)The fingerprint of the employee is rubbed seriously; choose a finger with clear fingerprint and register;
3)The employee don't press in the proper way; keep the fingerprint surface parallel to the sensor to keep enough contact area and improve the sensing speed.
4.Why terminal senses automatically and asks to repress the finger even when no person checks attendence? A:Reasons and solutions:
1)The terminal is irradiated by sunshine directly or the position where the terminal is placed has strong light; please move the terminal to another position;
2)The fingerprint sensor is stained with dirt; please wipe with wet soft cloth;
3)Access the menu of the terminal to set the [Bri Adjust]. Please contact local service center if the problem still exit.
5.Why the LCD of the terminal isn't clear or only has backlight and no characters?
A:The terminal has the menu [LCD Contrast] and the value should be 22 to 30. If the value is 0, the screen only has backlight but no characters. You can also adjust this option in the management software if the terminal is connected to the PC.
6.Q:I use the attendance software for the first time. What should I do?
A:Refer to the manual of the attendance management software.
7.Q:What's the operating procedure when new employee is enrolled?
A:When the terminal is turned on, press the [MENU] button to access the menu, select [Enroll]→[OK]→User→ select registration type, for example, select [Finger]→[OK]→[New Enroll?]→select "Yes" and press the [OK] button→input the registration number→[OK]→follow the prompt and put the finger close to the fingerprint sensor of the terminal to read the fingerprint information→save the new registration and press the [OK] button.
other products